TPO (Thermoplastic Polyolefin) roofing is a highly durable and cost-effective solution for commercial buildings. However, like any roofing system, it requires proper maintenance to ensure its longevity, with seam cleaning being one of the most important steps during installation and maintenance. TPO seams, where sheets are welded together, are critical to the roof’s watertight integrity. Improperly cleaned seams can lead to failed welds, water infiltration, and expensive damage down the road.
In this blog post, we’ll walk you through the step-by-step process of proper seam cleaning for TPO roofing, including tips for preventing common mistakes.
Why Seam Cleaning is Important
Before you weld TPO sheets together, the seams must be clean, dry, and free of debris. Dirt, dust, oil, and moisture can interfere with the welding process, causing weak or incomplete bonds between the sheets. When this happens, water can seep through, damaging the insulation and underlying structure of the building. Seam cleaning ensures a strong bond and helps your TPO roof achieve its full life expectancy, which can be 20 years or more when properly installed and maintained.
Tools and Materials You’ll Need
To clean your TPO seams properly, you’ll need the following:
- Clean, lint-free rags or towels
- Seam cleaner (specifically designed for TPO roofing)
- Stiff nylon brush (if needed, for stubborn dirt)
Always check the manufacturer’s guidelines for specific cleaning solvents and tools recommended for your TPO roofing system.
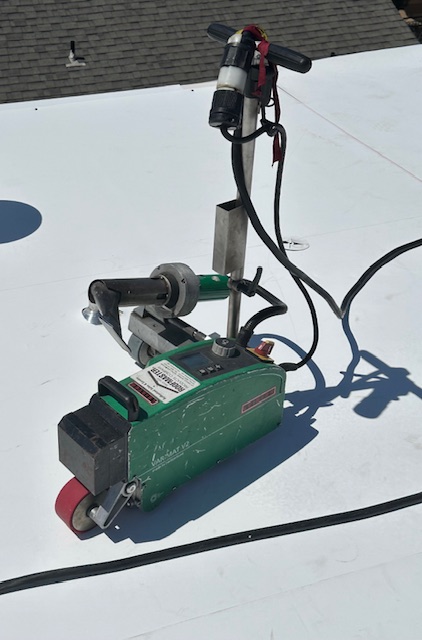
Step-by-Step Process for Seam Cleaning
1. Inspect the Seam Area
Before you begin cleaning, closely inspect the seams for any visible damage, tears, or signs of water infiltration. Repair any issues before proceeding with the cleaning and welding process.
2. Remove Loose Dirt and Debris
Use a dry, clean rag to wipe away any loose dirt, dust, or debris from the seam. It’s important to remove as much material as possible before using a solvent cleaner to avoid grinding dirt into the TPO membrane.
3. Apply the Solvent Cleaner
Apply the TPO-specific solvent cleaner to a clean, lint-free rag or spray it directly onto the seam. The solvent will help break down oils, adhesives, and stubborn grime on the TPO surface.
Tip: Work in small sections, especially on large roofs, to prevent the cleaner from evaporating before you can wipe it off.
4. Wipe the Seam Thoroughly
Using the rag, wipe the seam area thoroughly. Be sure to clean at least 3 inches on both sides of the seam to ensure proper bonding during welding. If the rag becomes dirty, replace it with a fresh one to avoid spreading contaminants.
Pro Tip: Make long, consistent strokes when wiping, rather than scrubbing in a circular motion, to avoid pushing dirt around.
5. Tackle Stubborn Stains (If Needed)
For stubborn dirt or staining, use a stiff nylon brush to gently scrub the seam. Be careful not to damage the TPO membrane by using too much force. After scrubbing, reapply the solvent cleaner and wipe the area clean again.
6. Allow the Seam to Dry
After cleaning, let the seam area dry completely before welding. Any moisture left behind can prevent a proper weld. In humid or cold conditions, you can use a heat gun to accelerate drying, but be careful not to overheat the TPO material.
7. Inspect the Seam Again
Once dry, inspect the seam to ensure it is free of dirt, moisture, and cleaning residue. If necessary, repeat the cleaning process until the seam is spotless.
Common Mistakes to Avoid
- Skipping the Drying Process: Moisture is the enemy of strong welds. Make sure the seam is completely dry before welding.
- Using the Wrong Cleaner: Not all solvents are safe for TPO. Only use cleaners recommended by the manufacturer to avoid damage to the membrane.
- Reusing Dirty Rags: Once a rag becomes dirty, it can spread contaminants rather than removing them. Switch to fresh, clean rags regularly.
- Not Cleaning Wide Enough: Always clean beyond the seam area to ensure full coverage during welding. Aim for at least 3 inches on either side of the seam.
Final Thoughts
Proper seam cleaning is a crucial step in ensuring the longevity and performance of your TPO roofing system. By following the steps outlined above, you’ll ensure that your TPO seams are ready for welding, providing a strong, watertight bond that protects your building for years to come.
Regular inspection and cleaning of your TPO seams should be part of your ongoing roof maintenance plan to catch any issues before they escalate. When in doubt, consult with your roofing manufacturer or a professional contractor for advice on maintaining and repairing your TPO system.
Proper care and attention now will save you time, money, and headaches later on!